Live Long and Prosper!
Welcome to my tutorial for mounting Vulcan ears for display.
My partner gave me a pair of beautiful Vulcan ears (worn by Tim Russ in Voyager) as a gift in celebration of finishing my first year of law school. Tuvok is, by far, my favorite Vulcan. Tim Russ seemed to deeply understand Vulcan motivations and expressed them in a way that was true to canon, while also carefully adding to the range of possible Vulcan expressions.
Anyway, while I didn’t exactly know how to display the ears, I also didn’t feel comfortable taking them down to a frame shop where the framer would not share my attachment to the little pieces of rubber. Most of all, I didn't want them to sit in a box, unloved and under-appreciated.
I wanted to mount my own in a professional-looking, protective way and I discovered that it’s actually quite easy to do so! I’ll try to show you how here, with pictures and brief descriptions.
BRIT'S TUTORIAL for MOUNTING VULCAN EARS
1) Gather your materials. You will need:
- 1/2" wide Heavy Duty Felt Strips - These will do.
- 5x7" Shadow Box Frame with Felt Backing Board - I got mine at Aaron Brothers, but can’t find the exact version of the frame I purchased online. The box I purchased is 5x7 with a black felt backing and looks similar to this one. If you can't find a shadow box with felt backing, you can substitute another shadow box that you like (at least 2 inches thick) and wrap the backing-board with a thin piece of black felt.
- A small piece of sticky-back Velcro like this one. If your backing-board/felt is black, you might want to get black, but it shouldn't show anyway so doesn't really matter.
- Scissors similar to the kind with the orange handle, not these.
2) Measure and cut the strips.
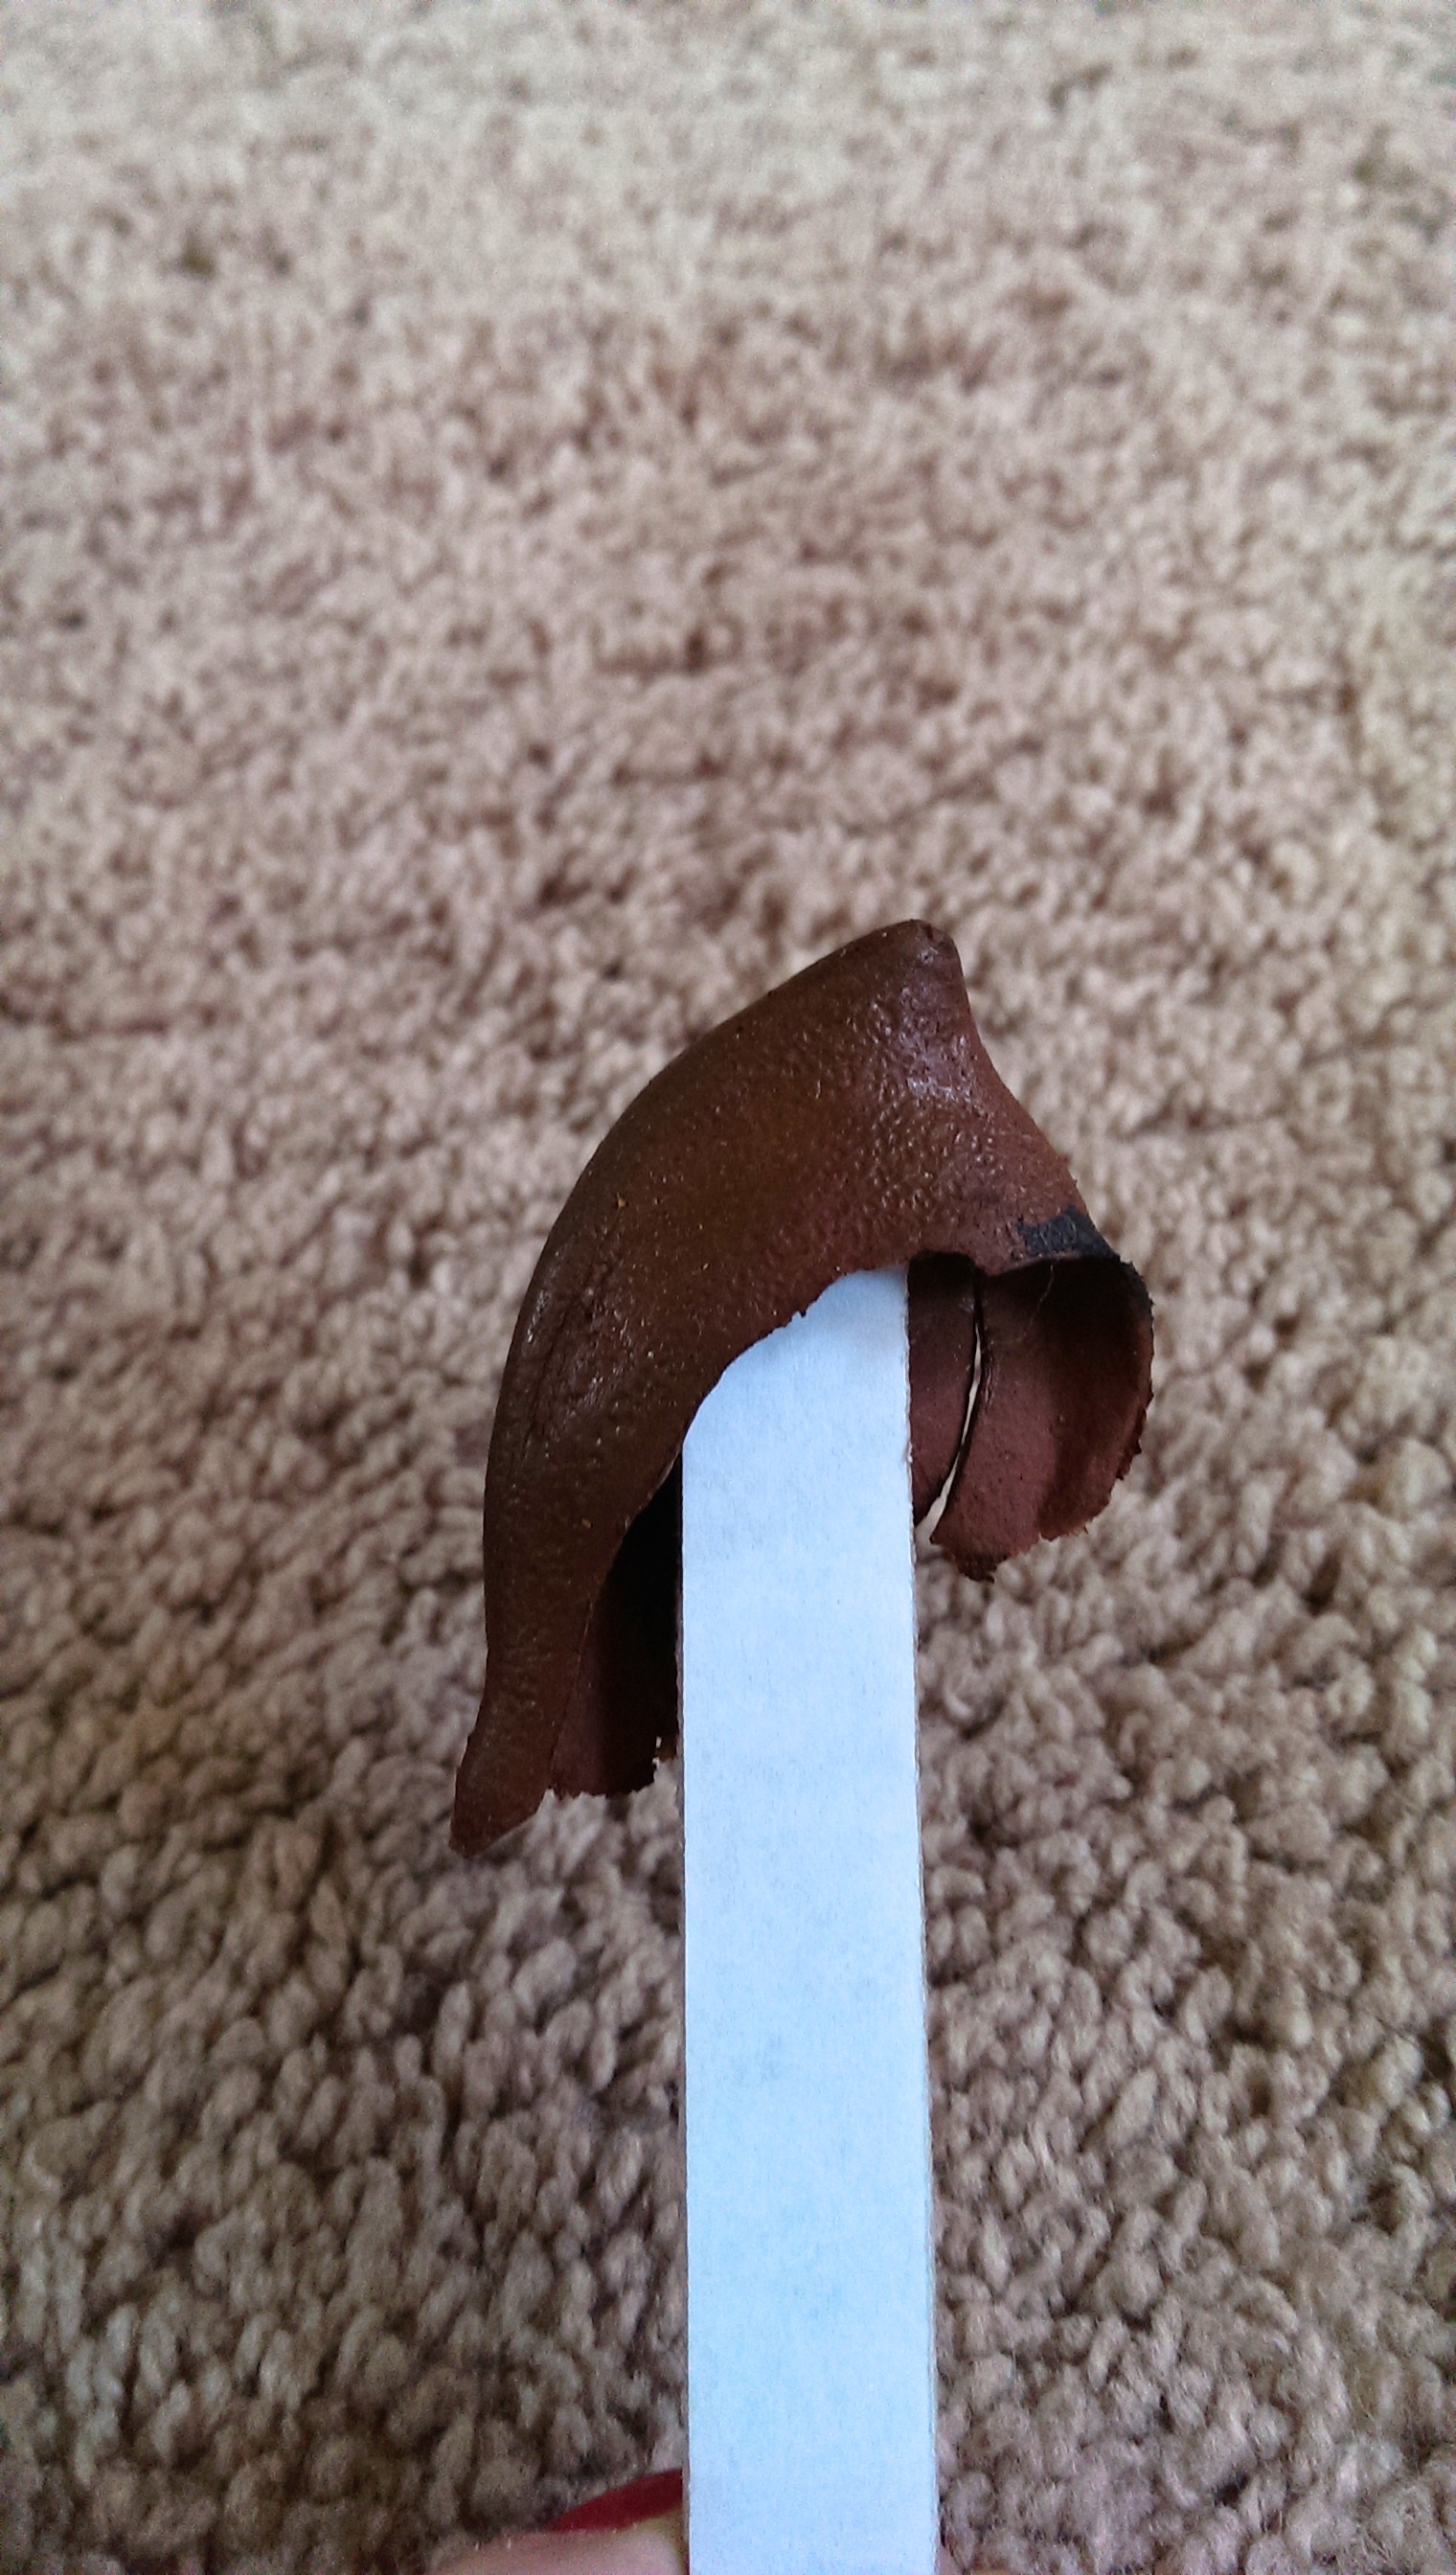
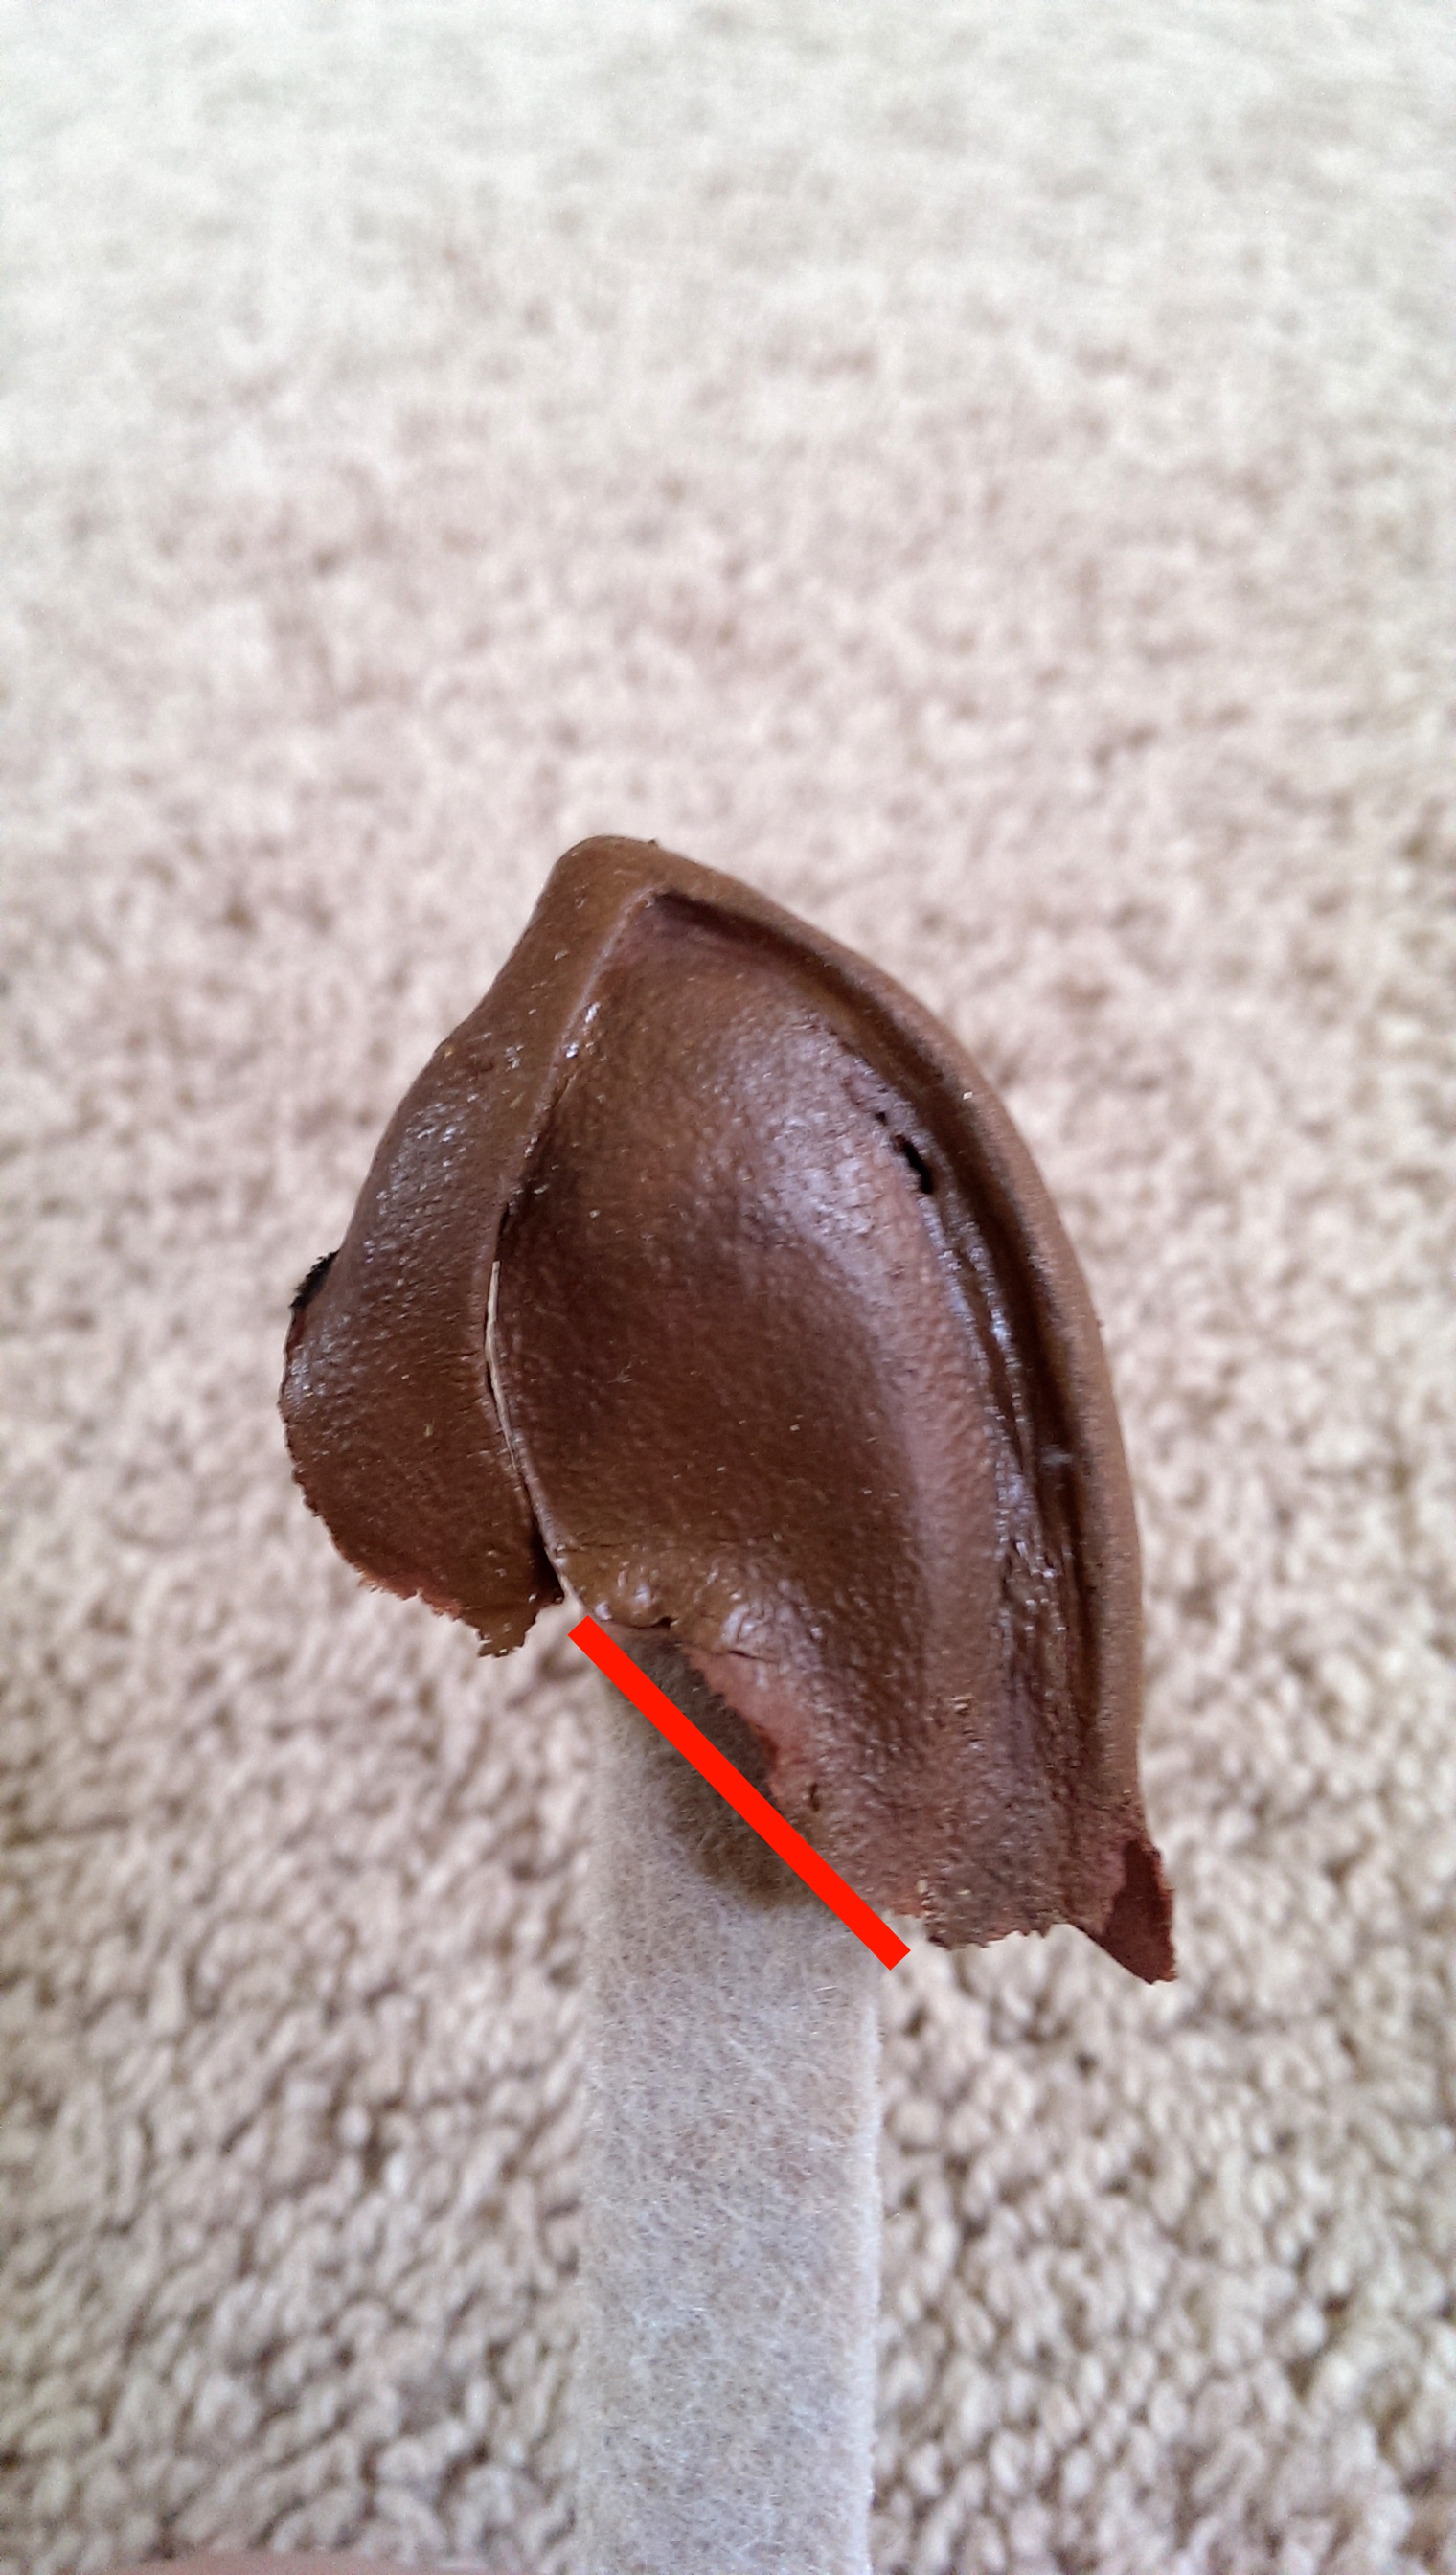
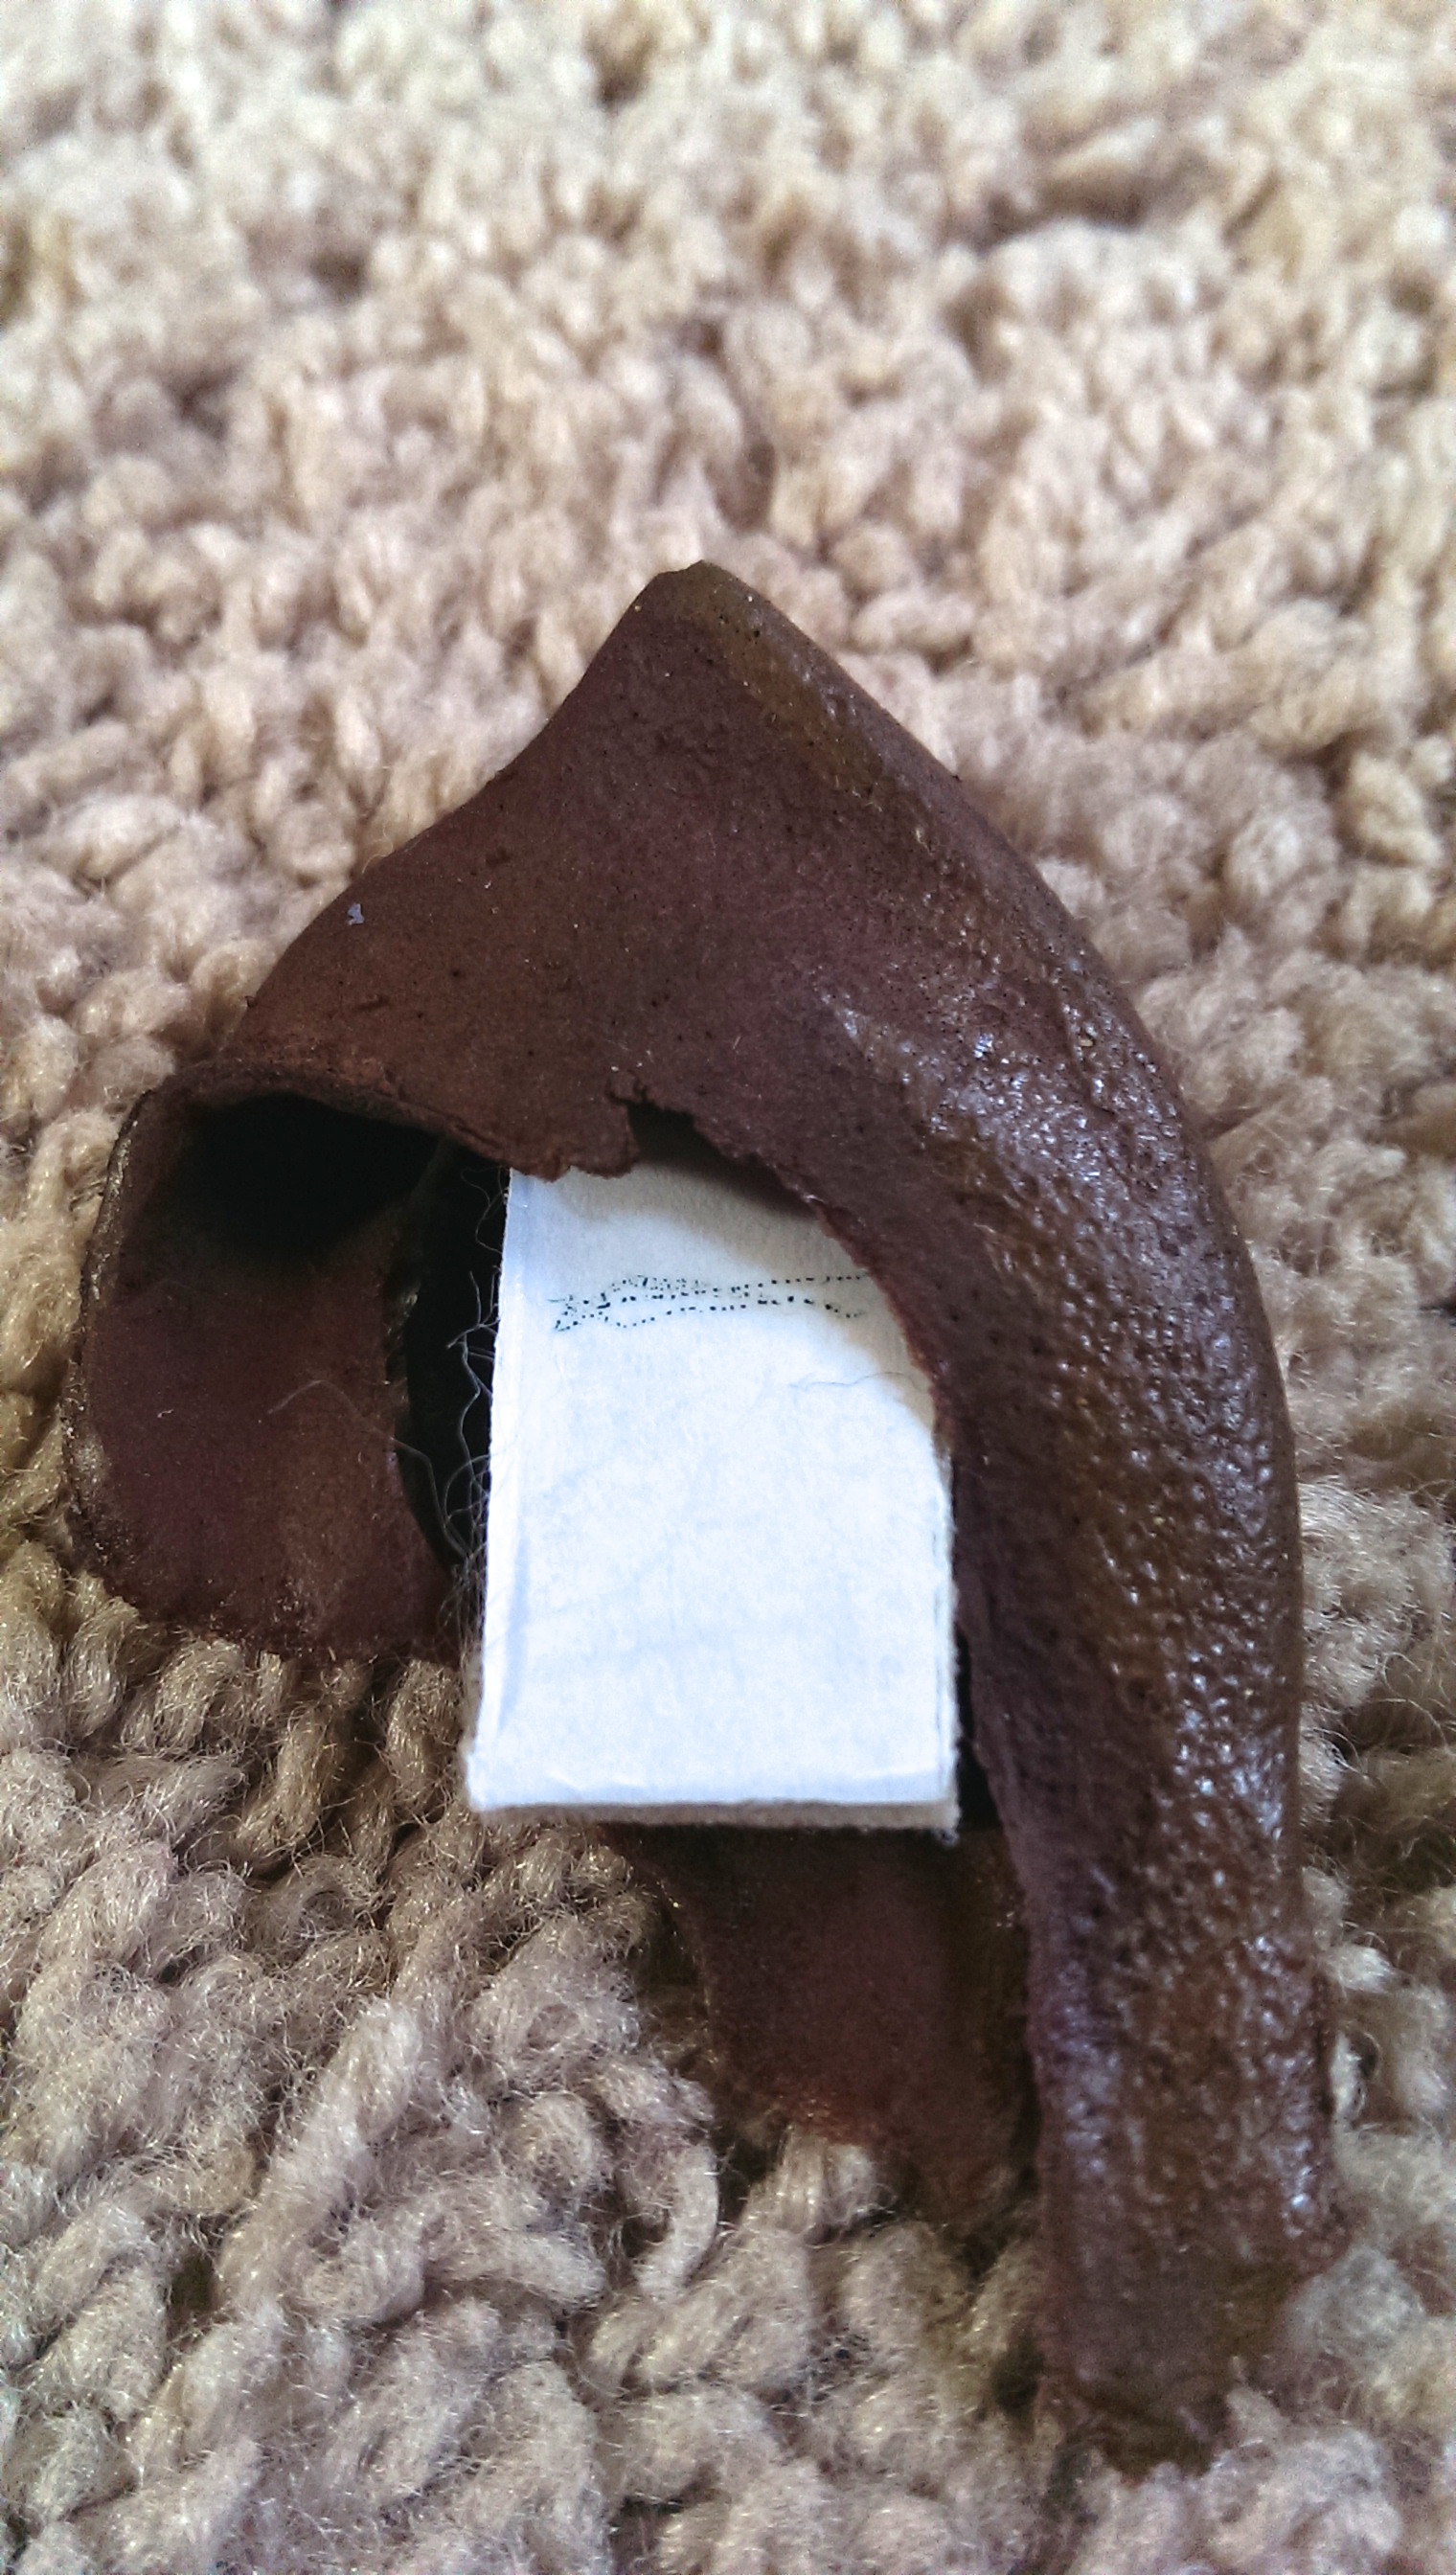
Pull off one of the felt strips and gently insert the strip inside the ear with the fuzzy part facing the front of the ear. Position the strip so that it supports the ear and then use a pen to mark where the strip shows beneath the ear. You will trim the strip (likely at a diagonal, depending on the form of your ears) so that the strip can't be seen from the front of the ear.
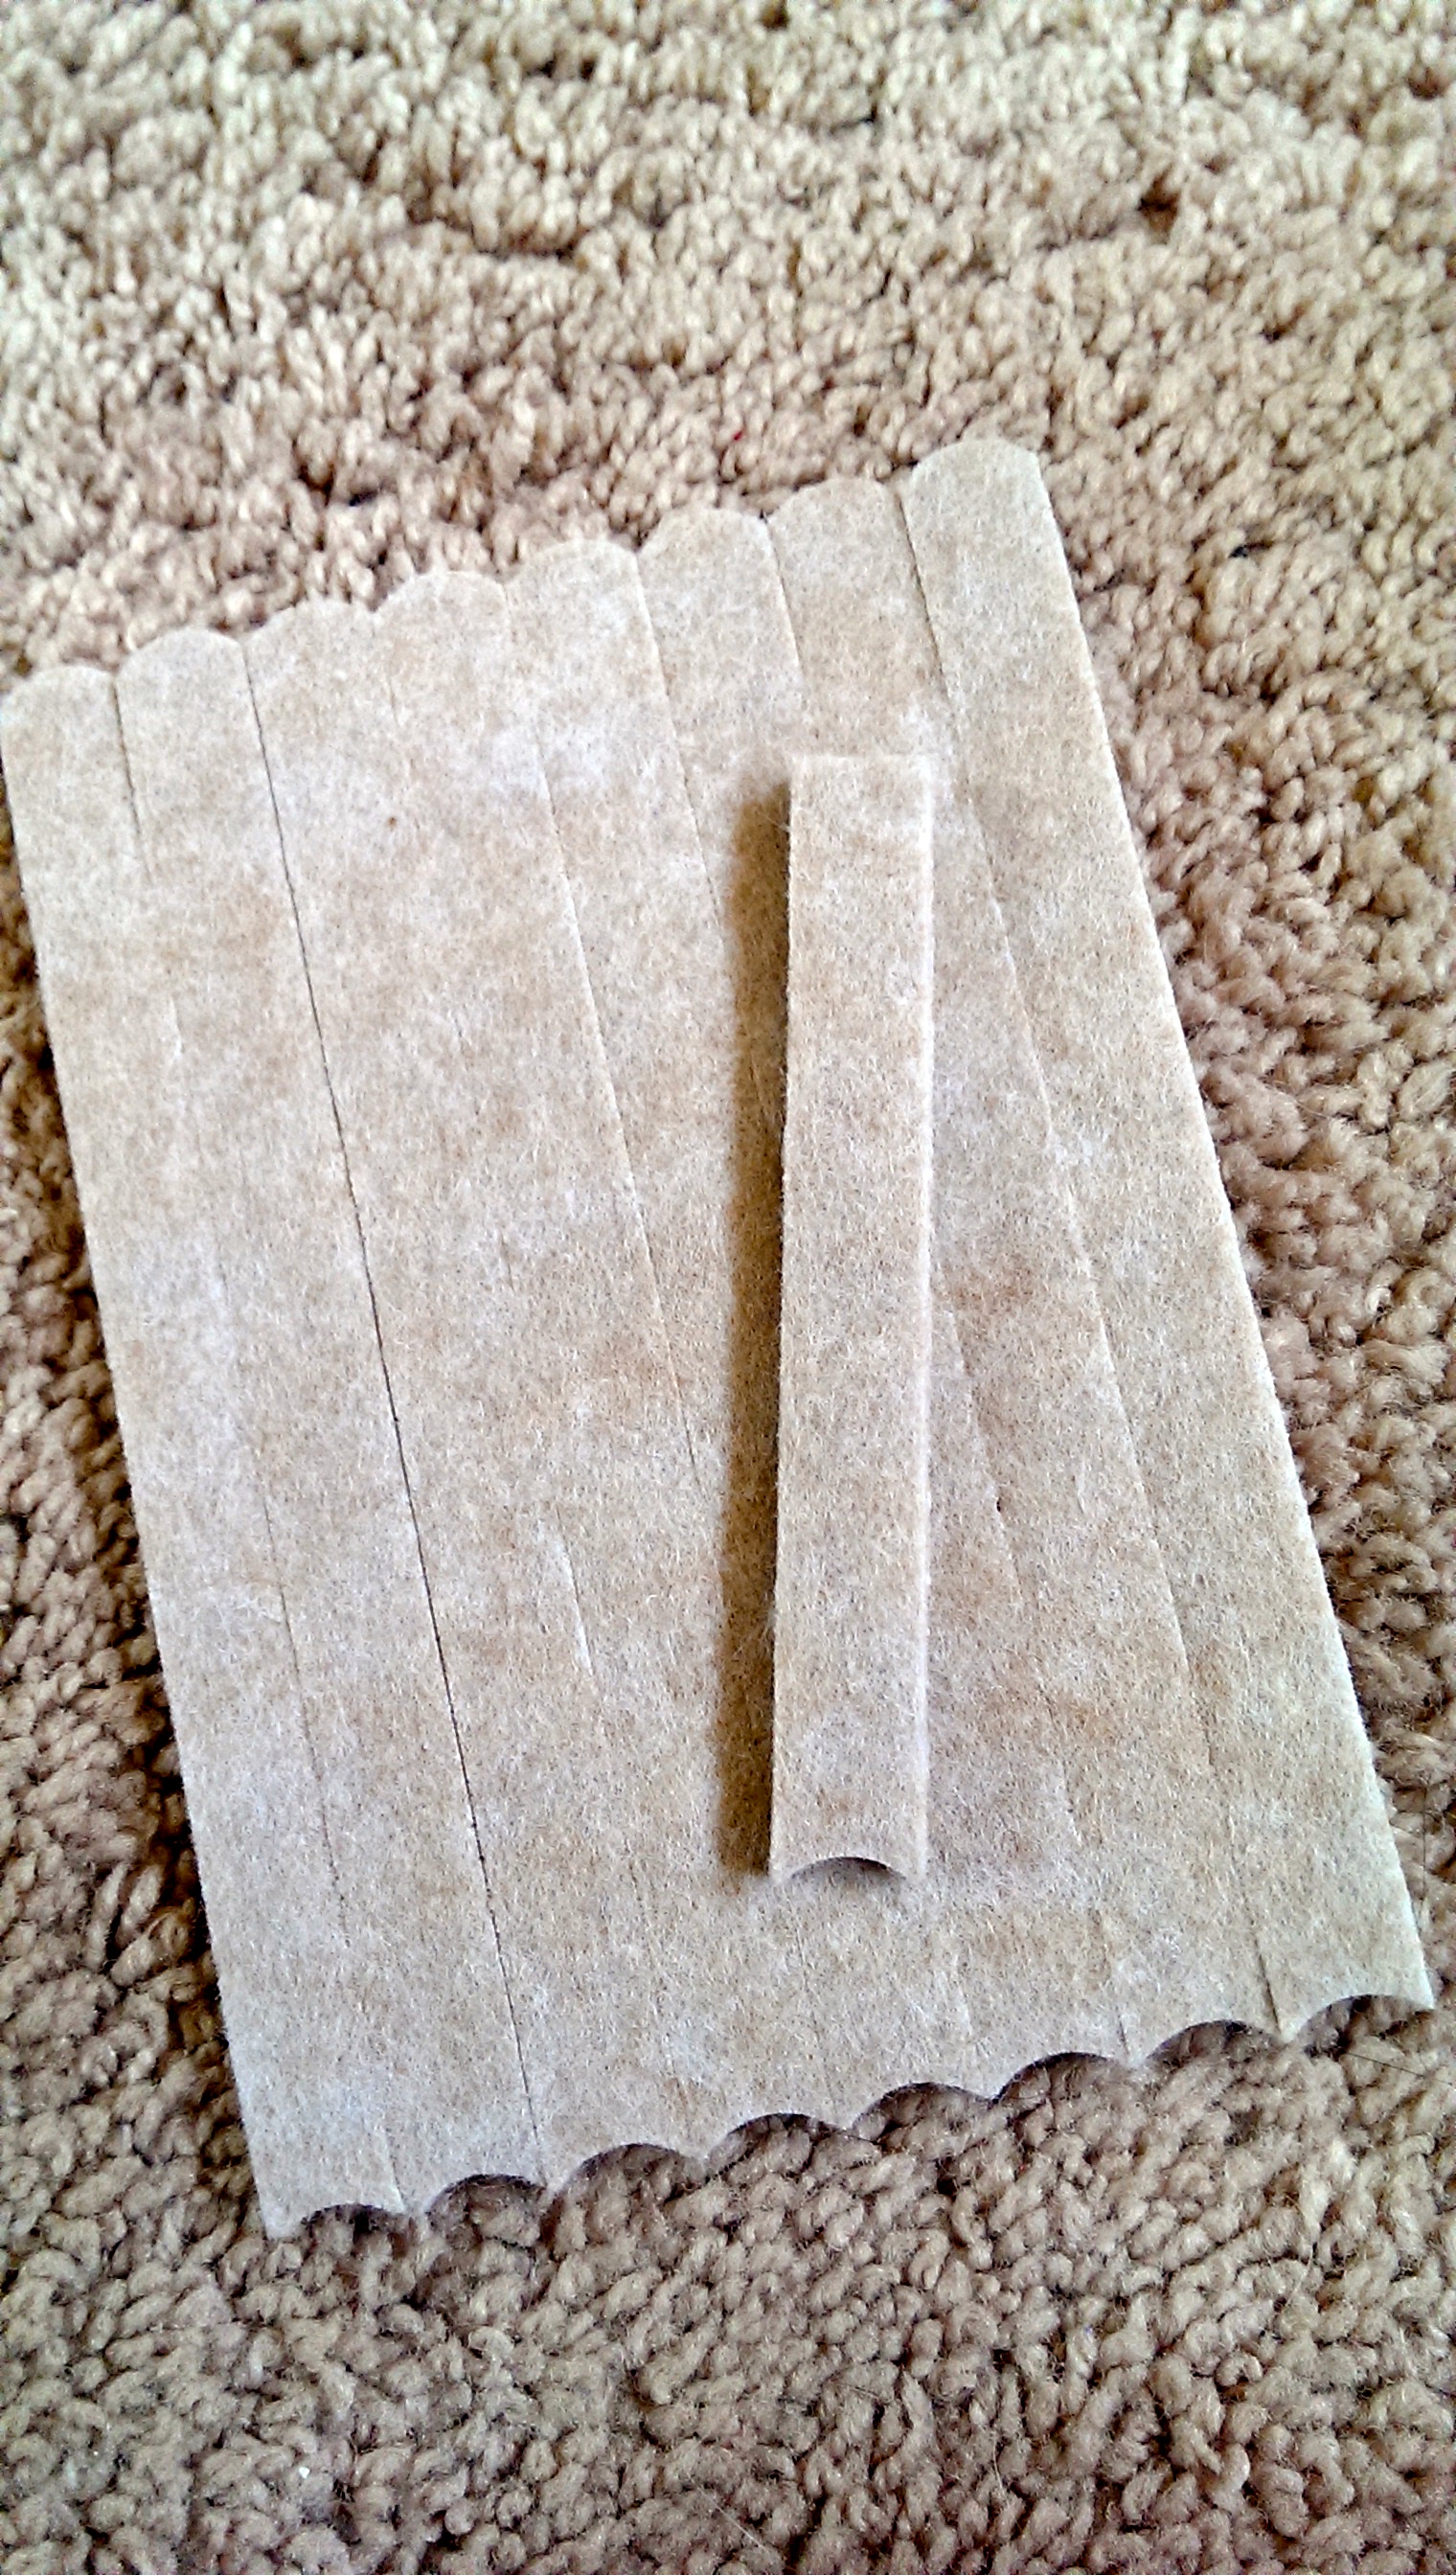
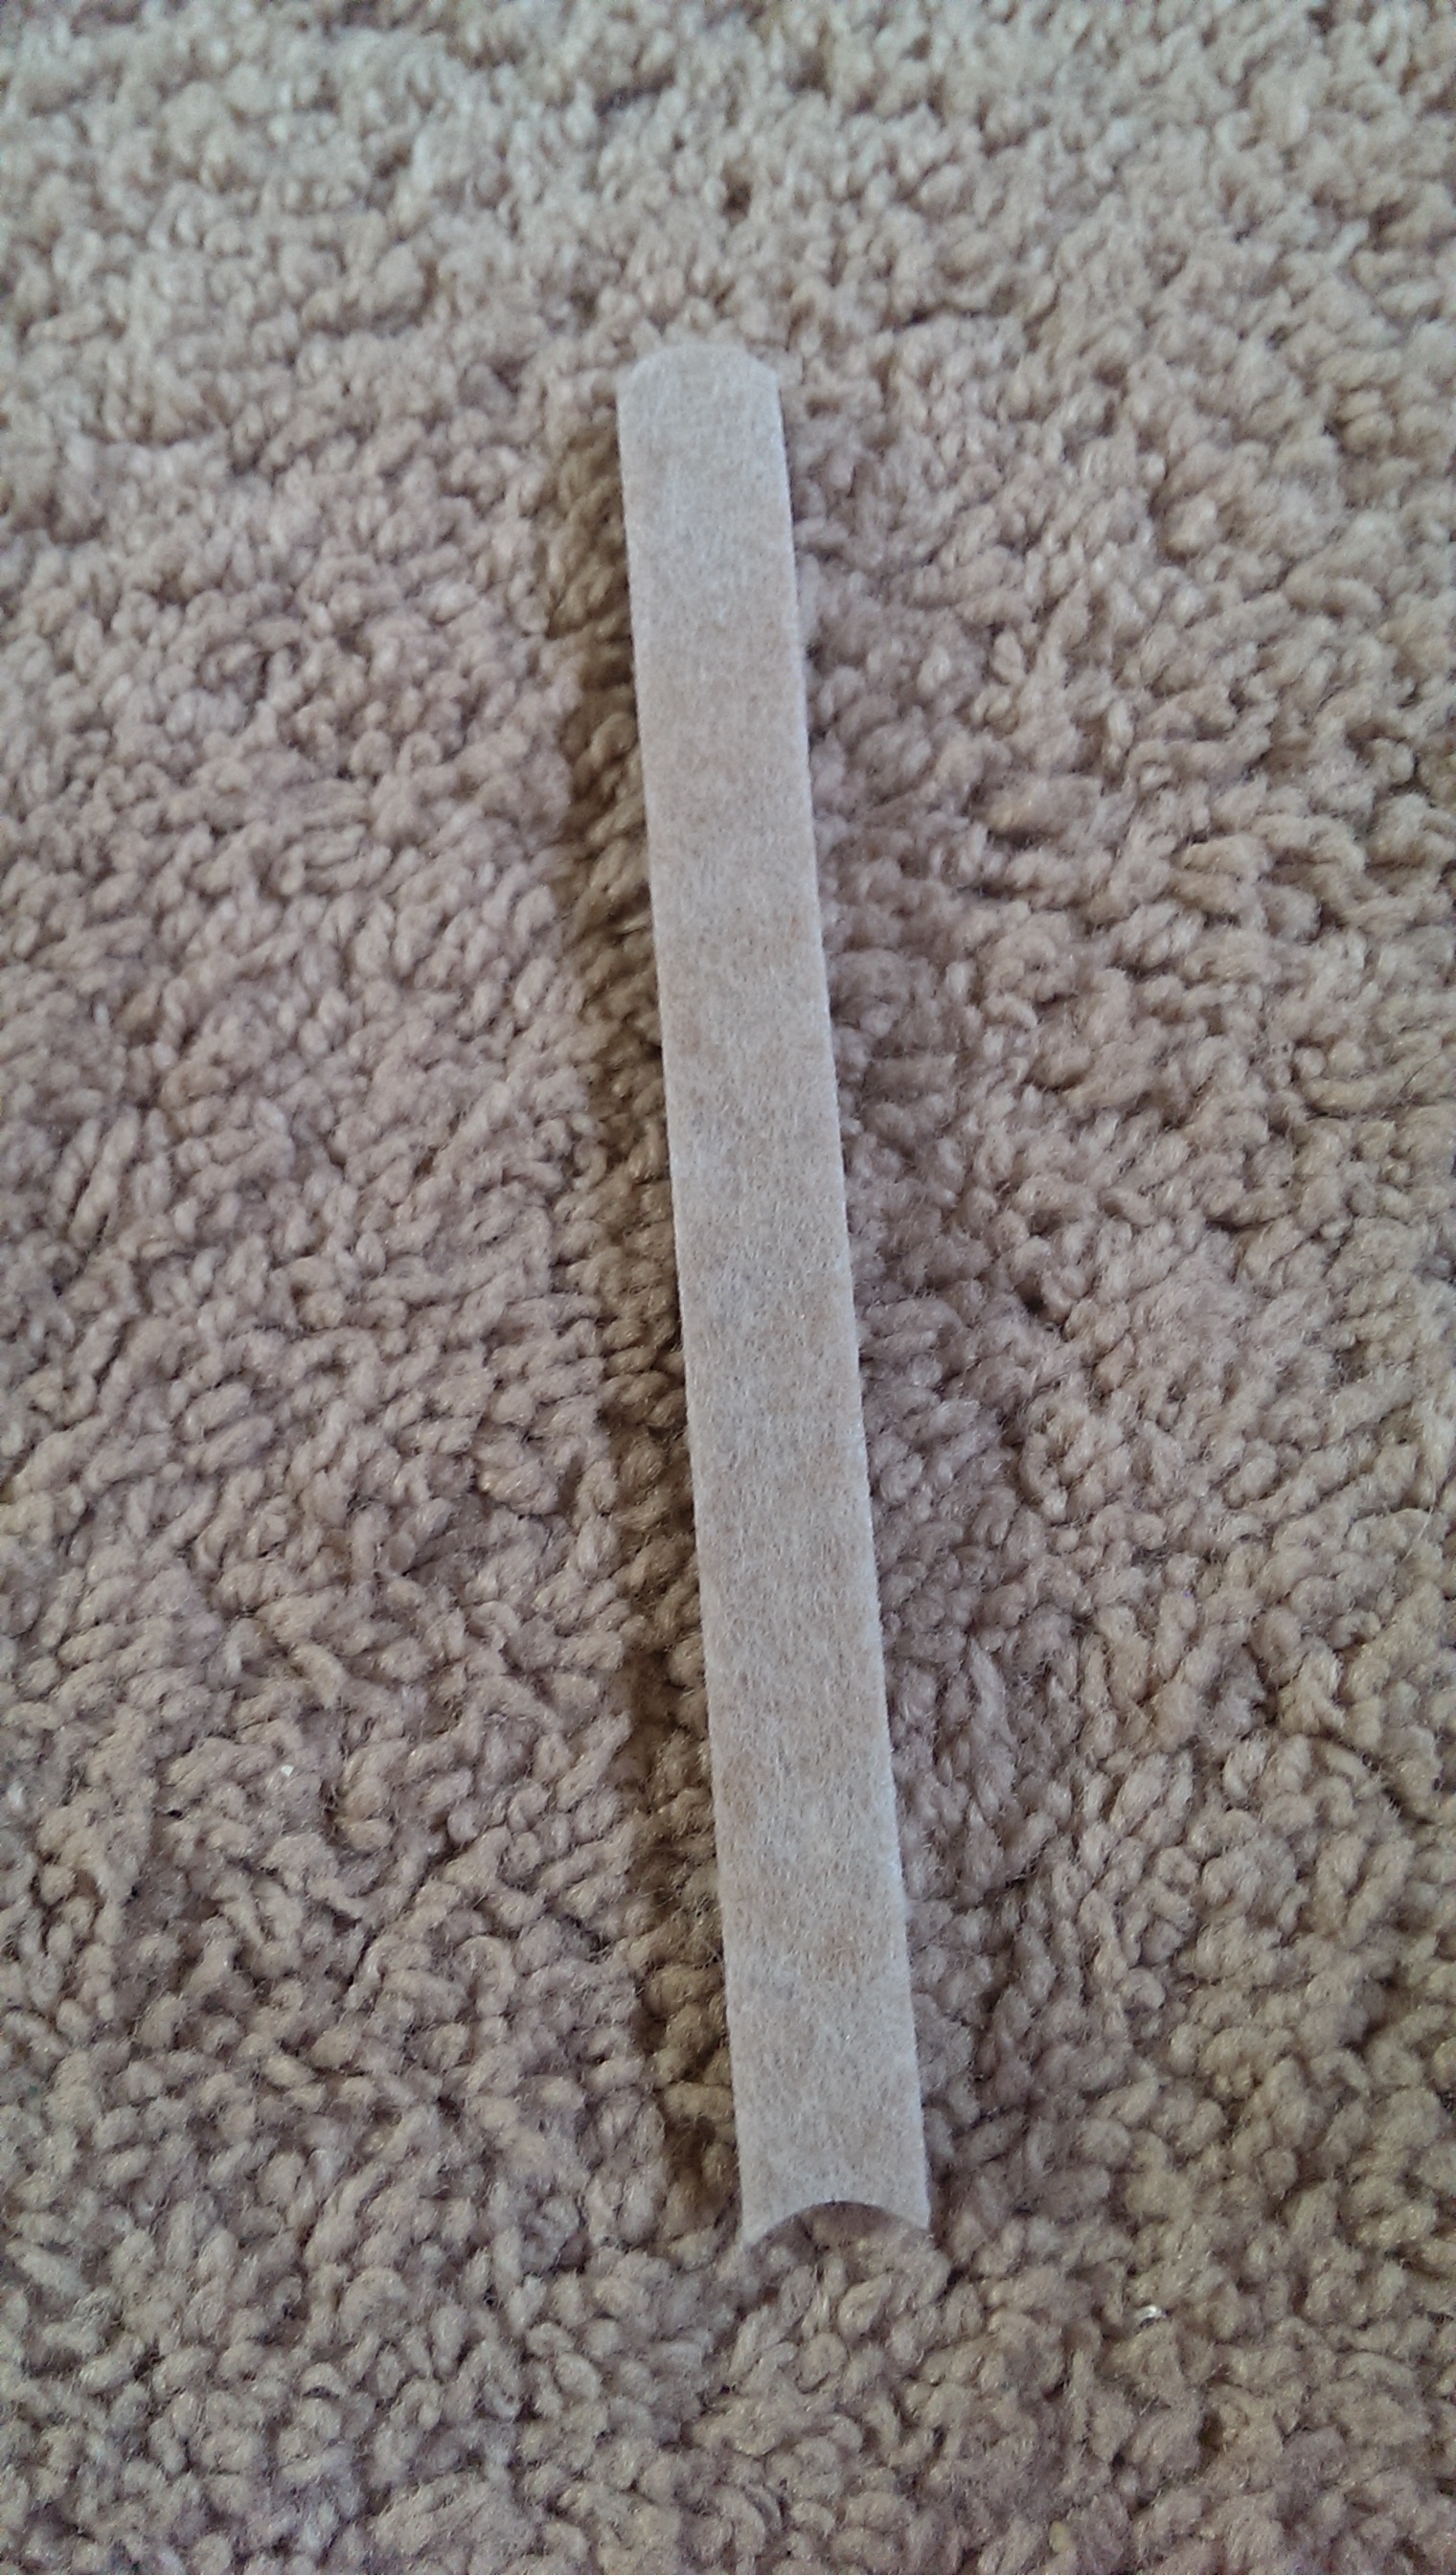
Images (from left to right) depict the following parts:
- The felt strips all together
- One of the strips, pulled off from the others
- Ear from the back, with a strip inside
- Ear from the front, for determining what length to cut the strip. The red line shows where you would cut the strip.
3) Mark the strips and further trim them.
Pull out the strip and then cut off the excess length. Reinsert it into the ear and use a pen to mark the part of the strip that falls below the back of the ear. The white space below the mark is where you'll attach the velcro. Make sure none of the strip shows when you look at the ear from the front.
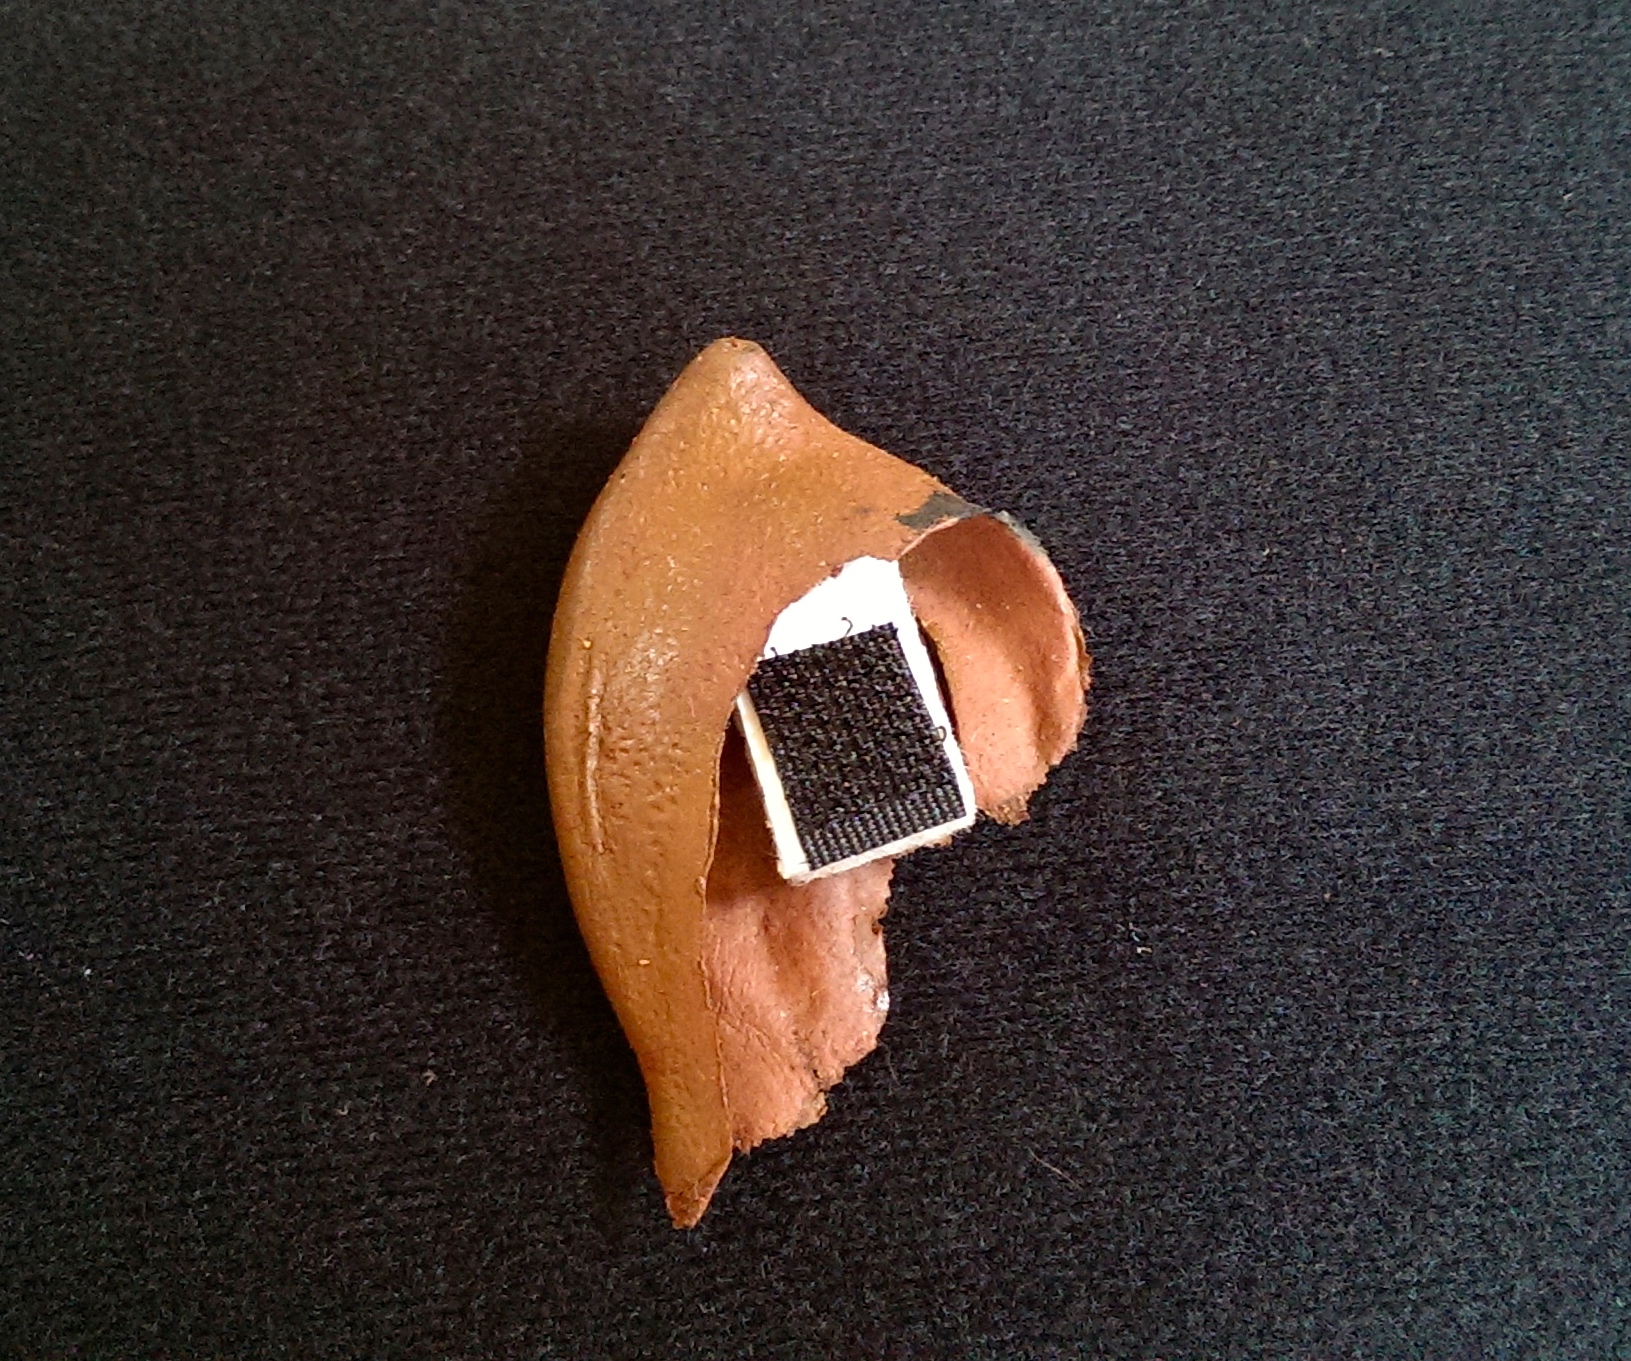
4) Velcro, let's go!
Cut a piece of velcro to fit the marked portion of the strip cut for your ear. Stick it on so it looks like the picture below. Essentially, you just want the soft part of the felt strip on the inside of the ear and for the velcro to be exposed from the back without having any velcro making contact with the ear. My ears are fragile, and I expect many other collectors find them similarly delicate --- the velcro could snag, pull, or otherwise mess them up.
5) Positioning!
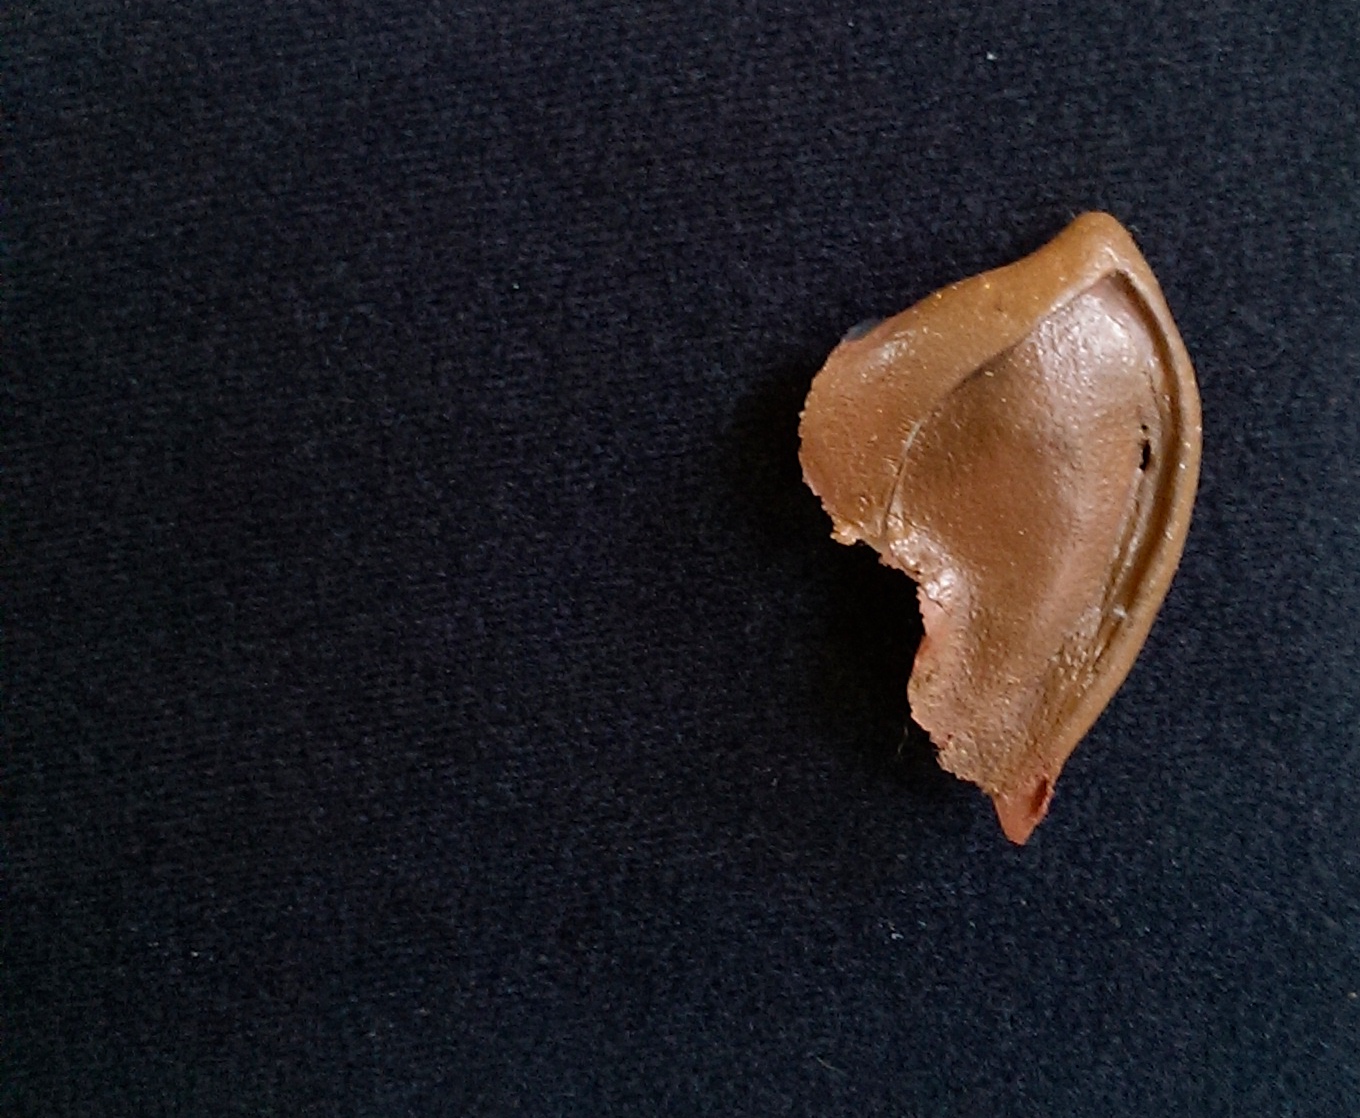
Hold the ear gently, keeping the tab inside of it, and place it on the felt board in the position that you'd like. Gently press down the velcro and it will stick. Voila!
6) Lather, Rinse, Repeat!
Now just follow the same steps for the second ear. If your ears are anything like mine, they'll be different from each other such that it works better to do each ear's strip-measuring, marking, cutting, and velcro-ing individually. Once they are both finished, you can play around with different positionings until you find the layout you like.
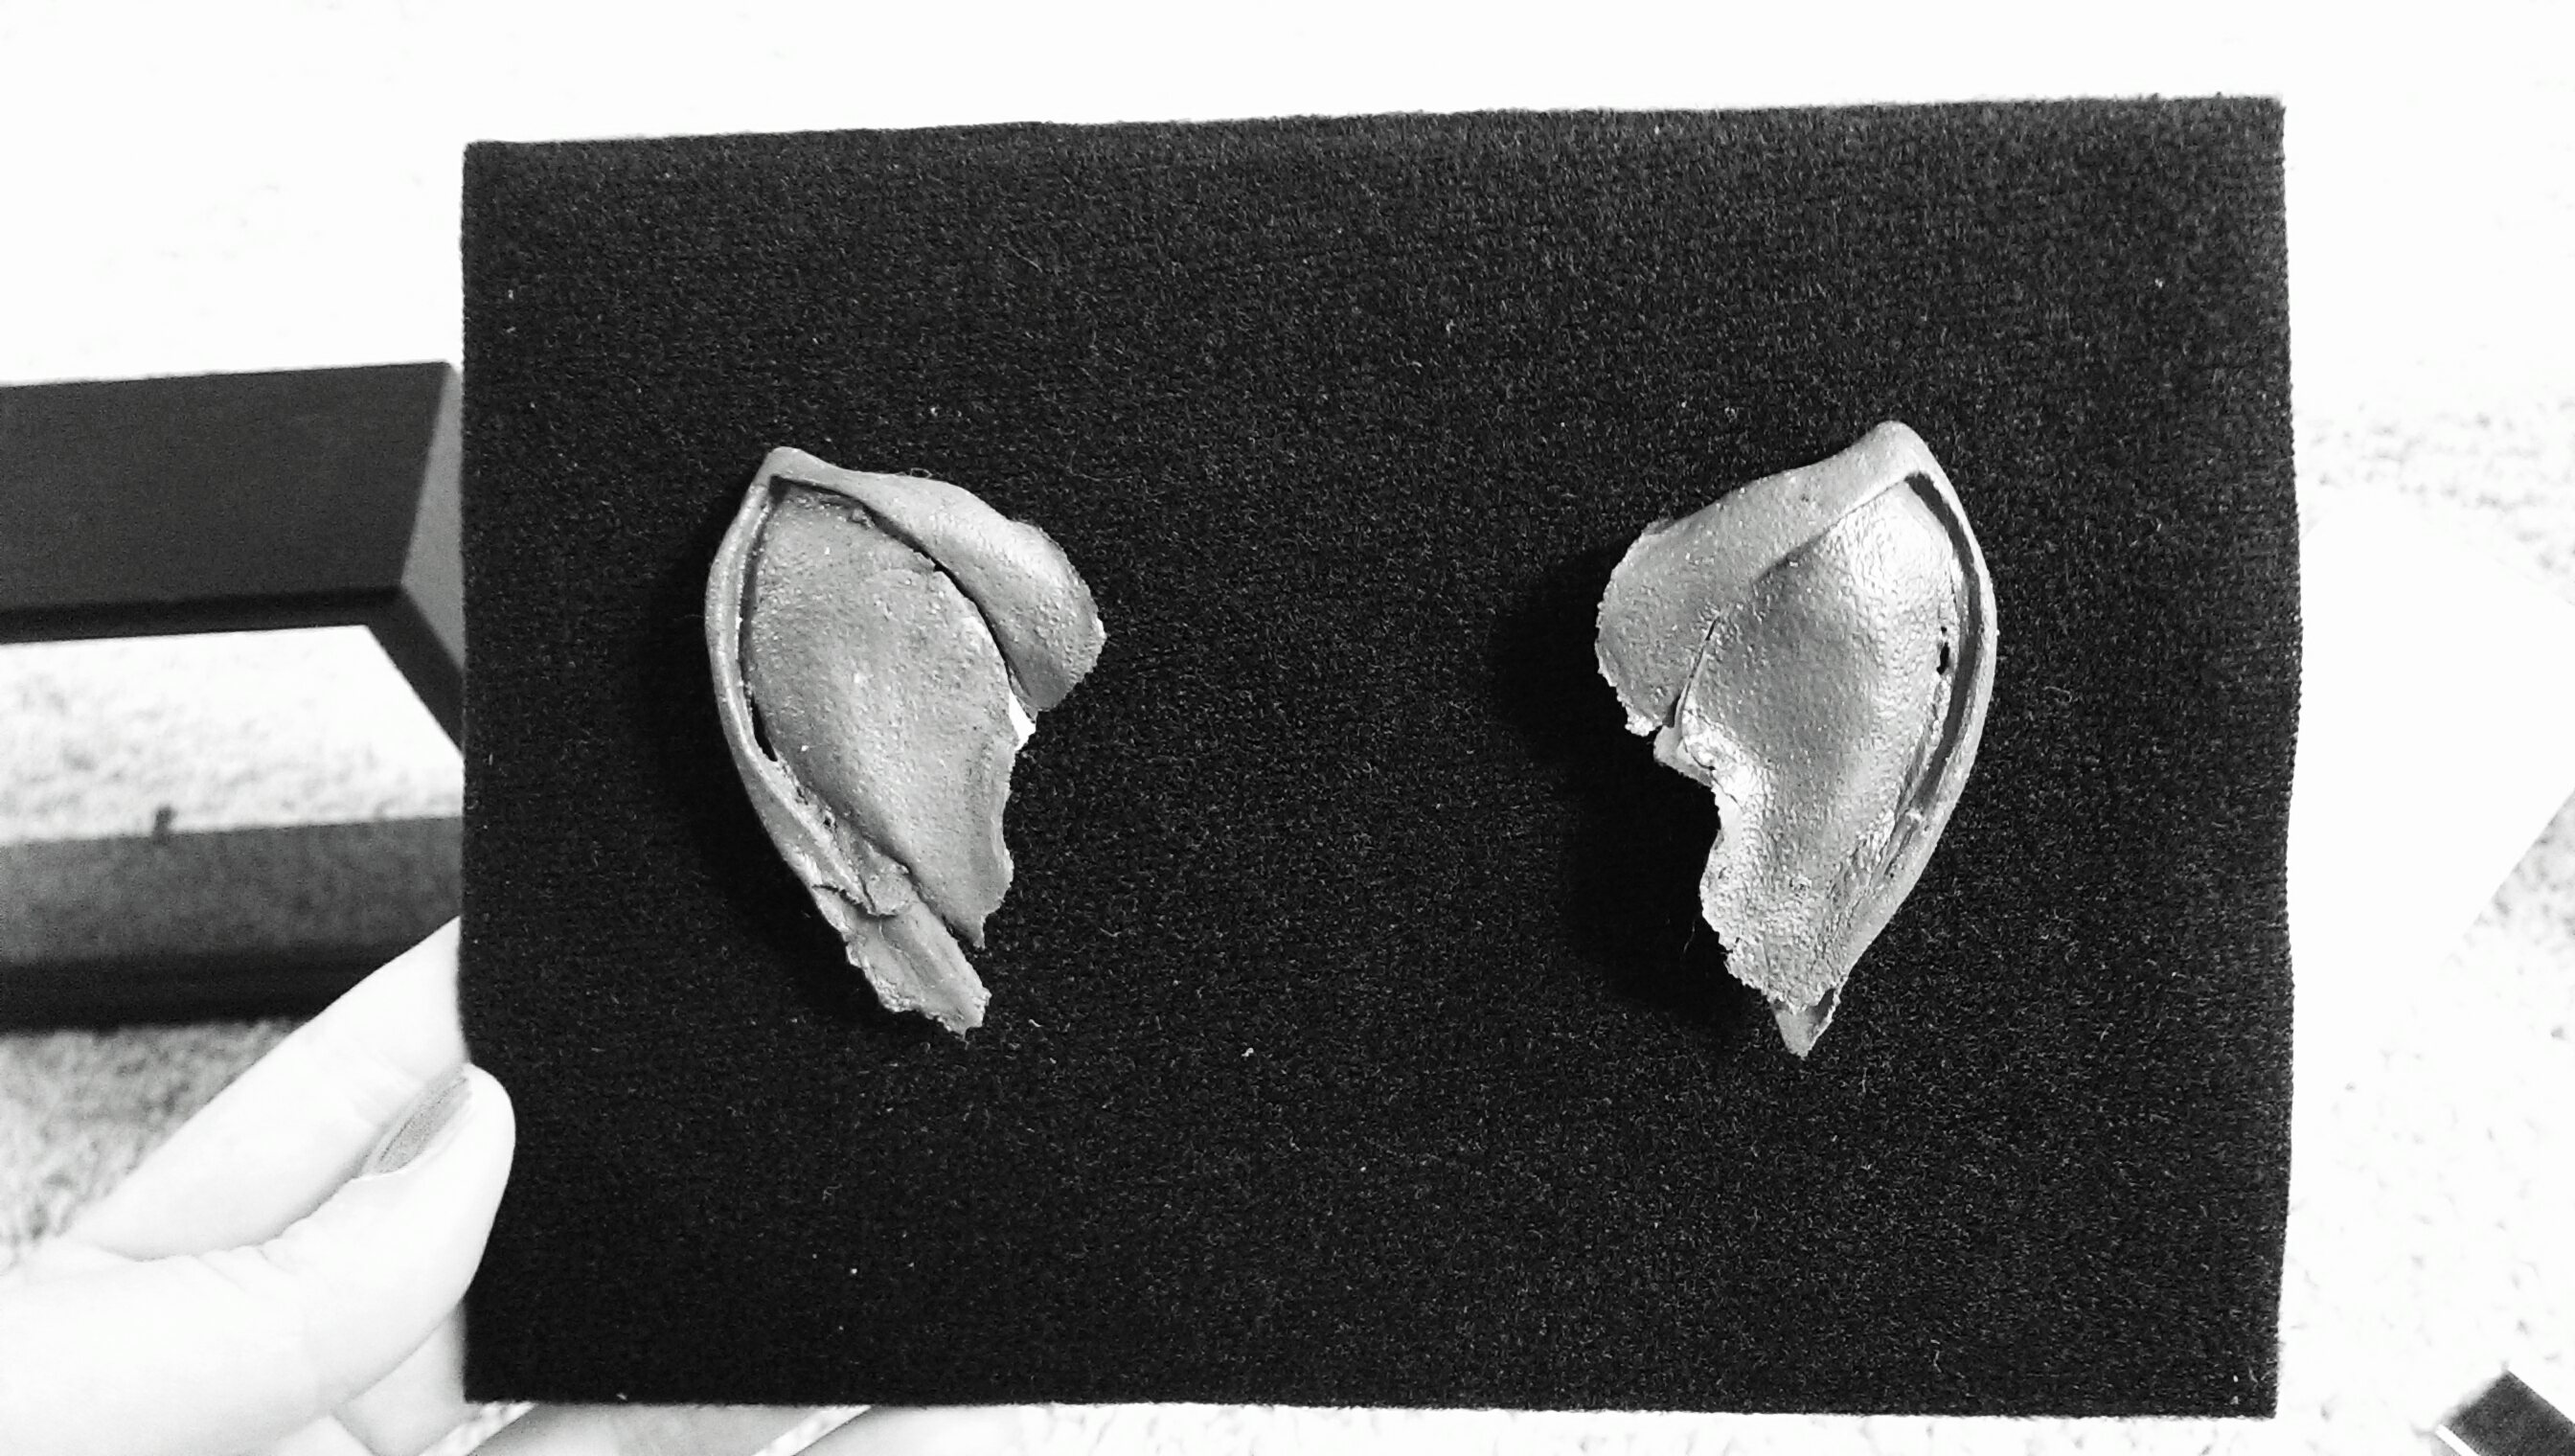
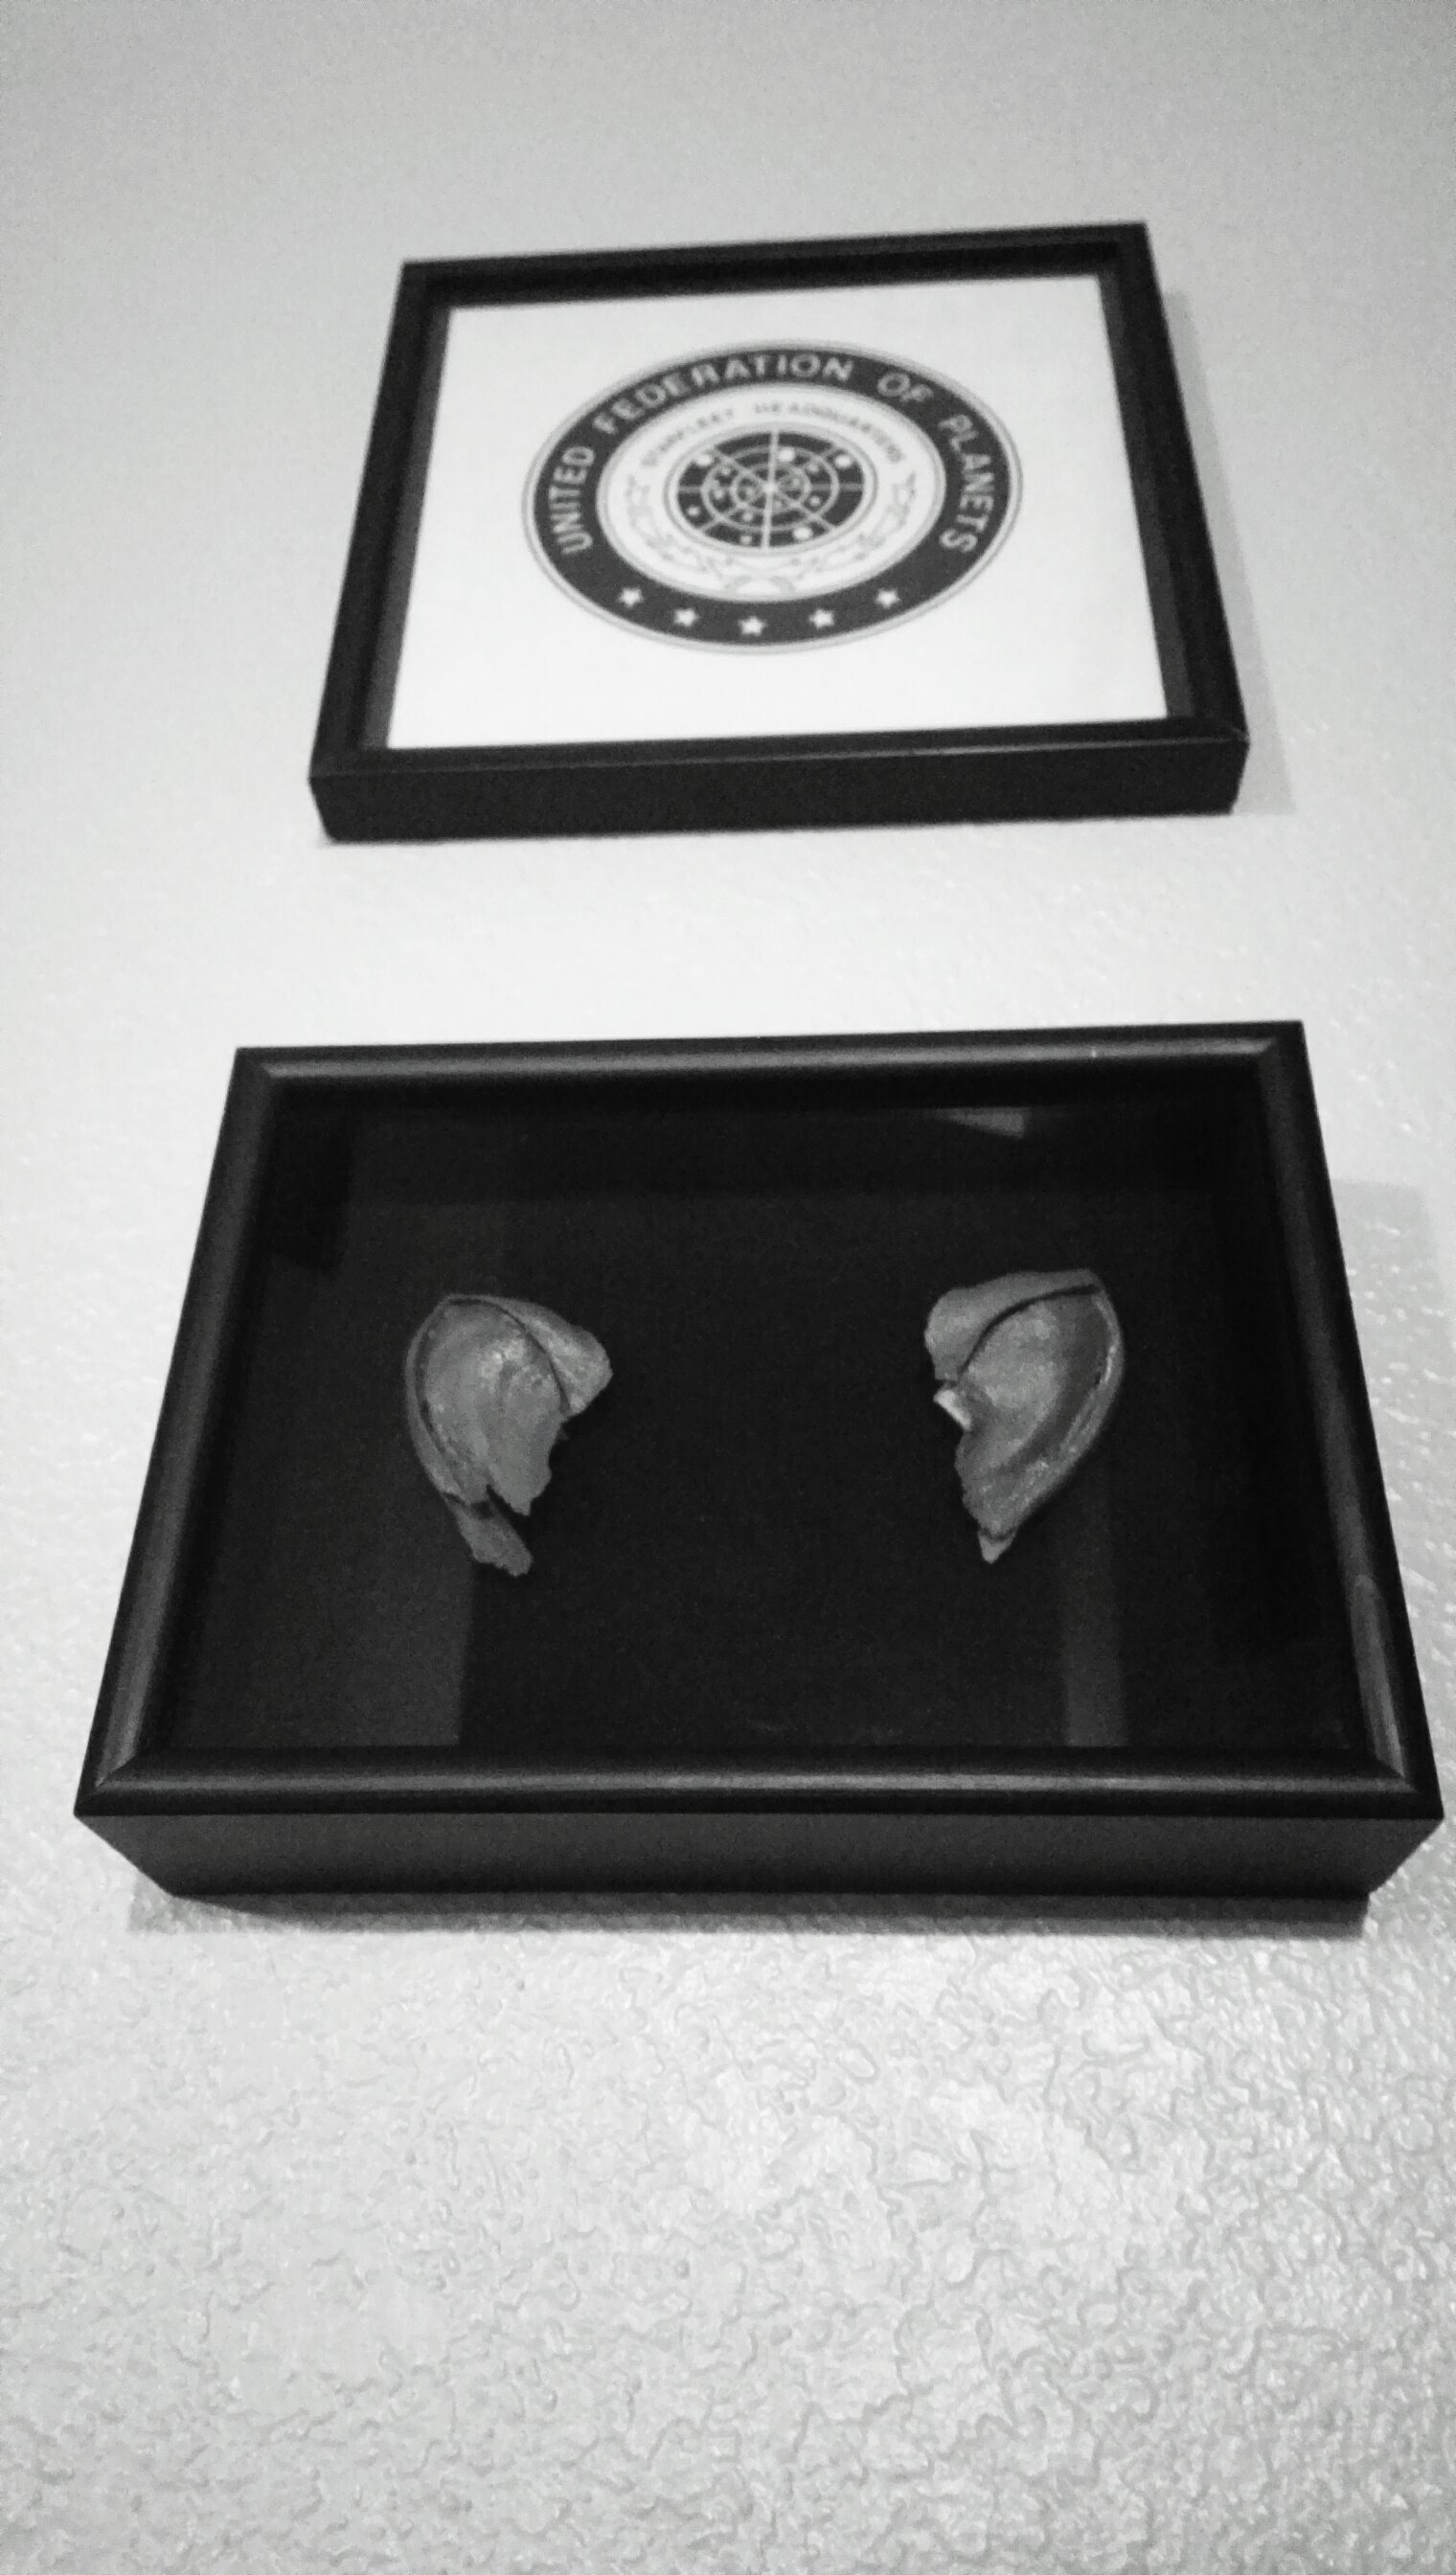
7) Voila!
Then pop the back on the frame and enjoy your beautiful, and safely mounted, Vulcan ears.
If you have any questions about this tutorial, or suggestions for how I can make it more useful, please let me know!

Live Long and Prosper, my friends. With love, Brit <3<3<3
If you're looking for music by Brit Benjamin, click here to navigate to my Bandcamp.
If you would like to see videos of past shows, click here to find them on Vimeo.
My Facebook is here and I am @britbenjamin on Twitter.